Touching Up Minor Scratches
By Sal Marino
There are a number of methods you can use to touch up scratches in the finish on a piece of furniture. The method I use, depends upon how large (deep, wide and long) the scratch is. Before we discuss this method, I feel it is necessary to define exactly what a scratch is and how to determine the extent of the damage caused by the scratch.
A scratch occurs when the finish and color in the finish (or below the finish) has been removed. On the other side, when not only the finish and color has been removed, but also some of the wood below, this is not considered a scratch, it is a gouge. Gouges are more difficult to repair properly, because you need to fill the void left where the wood once was and add color and finish back into the spot. I will discuss the method of repairing a gouge in a future document on my homepage. The following method described will be effective on minor scratches (NOT GOUGES).
Correct lighting is an absolute necessity when you are performing touch up work. Without the right light, you will not be able to determine the extent of the damage and have a difficult time trying to match color and sheen. You must have as much light as possible around the workbench you are going to use to do the touch up. The light must be as close as possible to natural daylight and the light should not be directly over the work surface. I use two different types of light sources to help me in achieving a good touch up job.
First, for the main (fixed) lighting for my workbench I use (4) 6 foot fluorescent (daylight bulbs) mounted to the ceiling above the workbench. Daylight bulbs are much better at simulating the natural daylight conditions (created by the sun) than the standard clear or cool white fluorescent bulbs found in most fixtures. Daylight bulbs will enable you to determine the true color of the area you must touch up. These bulbs can be purchased at specialty lighting stores or from industrial warehouse suppliers. Check your local Yellow Pages for sources.
My secondary source of light is a regular (incandescent) light bulb that is not mounted directly over the work surface, rather above and behind the bench. See illustration below. Reflected incandescent lighting is a much more effective source for picking up minor flaws like small scratches and other defects that are normally hard to see with the naked eye under direct light.
With your main fluorescent (daylight bulbs) still on, turn on the incandescent light bulb to examine the scratch and determine the extent of its damage. make sure the light is shining down on an angle so it's reflecting off the surface. Once this is done, turn off the incandescent bulb and use the fluorescent bulbs only. From here on, it is usually only necessary to use this lighting to determine color, but if needed, you can switch back on the incandescent light.

The Touch-Up Process
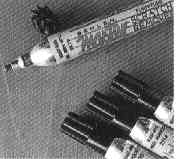
If the scratch is very superficial and the finish does not have a high gloss sheen, one of the quickest and best methods is to use a felt tip marker called a scratch remover. These markers are available in various colors such as: Amer. Walnut, Fruitwood, Dk. Brown Walnut, Light Mahogany, Med. Mahogany, Pine, Maple, Cherry, Golden Oak, Natural and more. You are almost sure of finding the correct color that you need. To use, just color in the scratched area with the pen and that's it! The one drawback about these markers is that you usually cannot apply a finish over it. The solvent in the finish will often lighten or completely remove the color left by the marker. Therefore, I only use this method when the scratch is so small that the color alone will hide it without also having to apply a finish to match the sheen.
The method I most often use is one of adding a color to a finish to touch up the scratch. Once this is done, (if needed) I then use a very fine artist's brush to paint in the grain on top of the scratch.
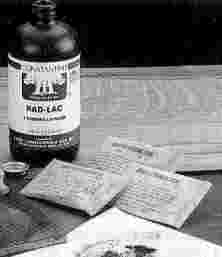
The finish I usually use is padding lacquer. This is compatible with most furniture finishes. If you make a mistake on any finish other than shellac, you can remove the finish by wiping it off with de-natured alcohol. To add the color to the padding lacquer, I use finely ground powders that are soluble in padding lacquer. These are called Blending Powders. They are available in many different colors such as: Honey Maple, Red Maple, Red Mahogany, Med Mahogany, Dk. Brown Mahogany, Blond Oak, Light walnut, Med. Walnut, Dk. Walnut and more.These powders can be inter-mixed to achieve virtually any color.
Select the proper color or combination of colors of blending powder to match the background (not grain) color of the finish where the scratch is. Take a small amount of padding lacquer and slowly add the powder(s) to the padding lacquer. The powders should readily dissolve, but make sure you mix anyway. Some colors may not dissolve as easily as others. For those colors, it's best to dissolve them first in a little padding lacquer solvent, then add this solution to the padding lacquer. Experimentation is necessary here in order to match the color as close as possible. Once you are satisfied with the color, apply the padding lacquer into the scratch using a fine artist's brush. Let this dry at least overnight. The next day, examine the overall color and appearance of the touch up. If it looks acceptable, leave it alone, you are done! However, if the area of the scratch appears a little too light, and the grain seems to be missing from that spot, you must apply a second color. Using the same process, select the color or colors of blending powder to match the color of the grain. This is usually darker than the first (background color) you applied. The grain is usually more opaque than the background, so you will have to add more powder in proportion to padding lacquer than you did when mixing the background color. Mix and dissolve in the same manner as described above. Now, use a very fine (pointed) artist's brush to paint in the grain. Try to connect the grain lines with the surrounding grain and feather in the lines to blend and soften the sharp edges made by the brush. Once the grain has been painted in, let sit overnight. It best to apply a little straight (un-tinted) padding lacquer over the painted grain lines. The next day, inspect the touch up using the incandescent light. If the area looks too glossy compared to the surrounding surface, buff VERY LIGHTLY WITH 0000 Steel Wool. Do not rub too hard or you can remove the grain lines that were painted in.
There are a number of other methods used for touching up scratches, but this is the one I most often use and seem to have the most success with.
Padding Lacquer, Padding Lacquer Solvent, Blending Powders, Artist's Brushes and Steel Wool can be purchased through Constantine's.
|
|

Return to Table of Contents CLICK HERE

Return To Sal Marino's Homepage